

How a campaign comes together in Minimo
Watch the flow
From the campaigns list to the final review, in the app
Before you start
1
Verify a sending domain
In Settings → Domain and tracking, add your domain and set the DNS records Minimo shows you.
Verifying SPF/DKIM is what keeps your campaign out of spam.
2
Have an audience
A campaign targets a segment or a list, not your whole
database. Create one first if you haven’t.
Step by step
1
Open Campaigns and create one
Go to Campaigns and click Create campaign → Email campaign. Your existing campaigns, their
channel, status and analytics live here.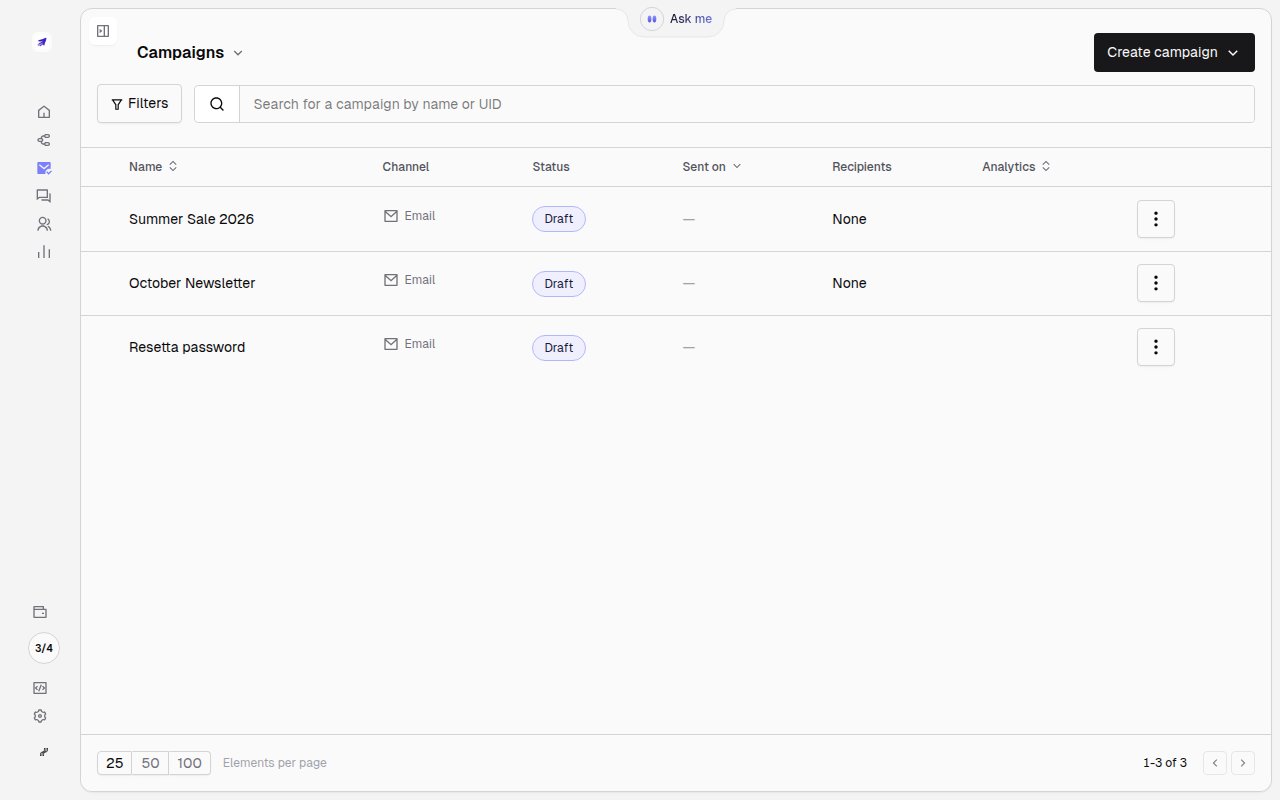
2
Write the email
Set the subject and build the body from sections, or describe it in plain language and let Mo
draft it. Fields like 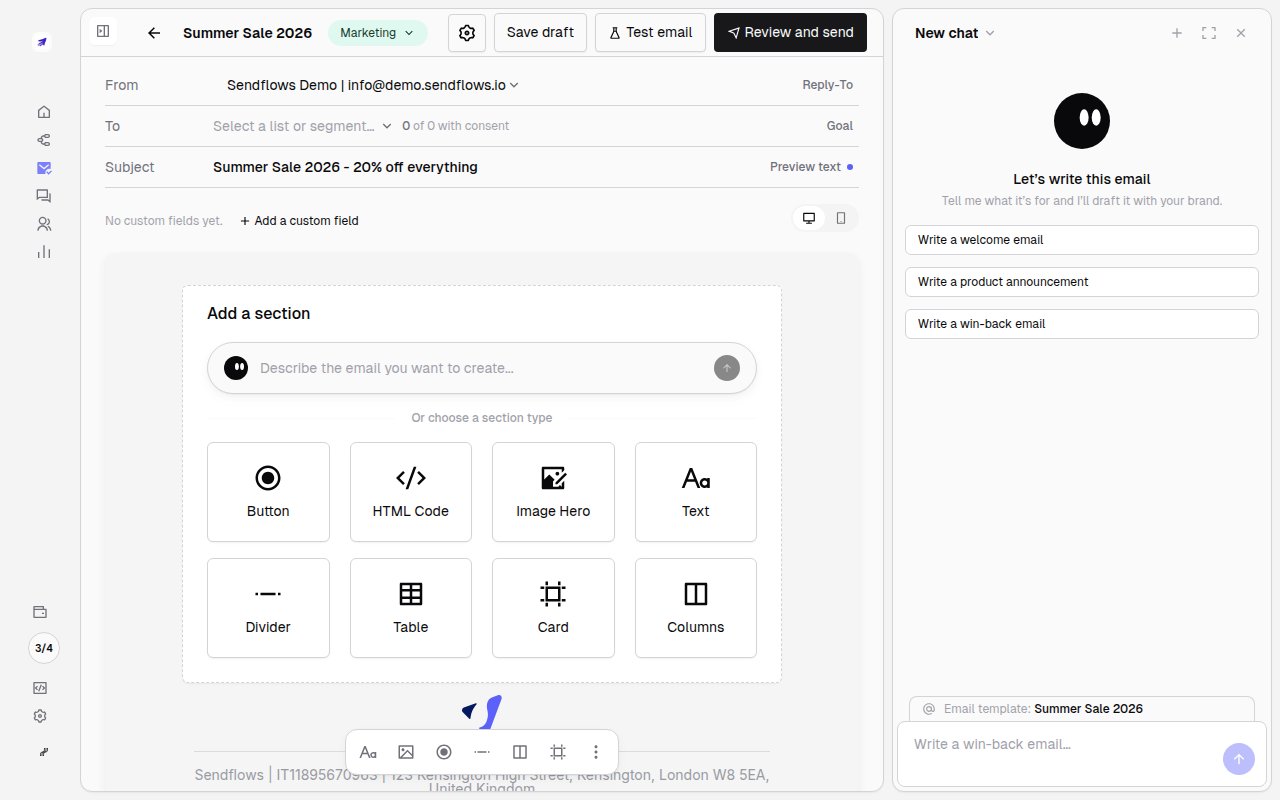
{{firstName}} are filled per recipient at send time.3
Pick the audience, review and send
Choose who receives it under To, then Review and send. Minimo shows a pre-send checklist
(sender, subject, content, unsubscribe link) and the recipient count before anything goes out.
Use Test email to send yourself a copy first.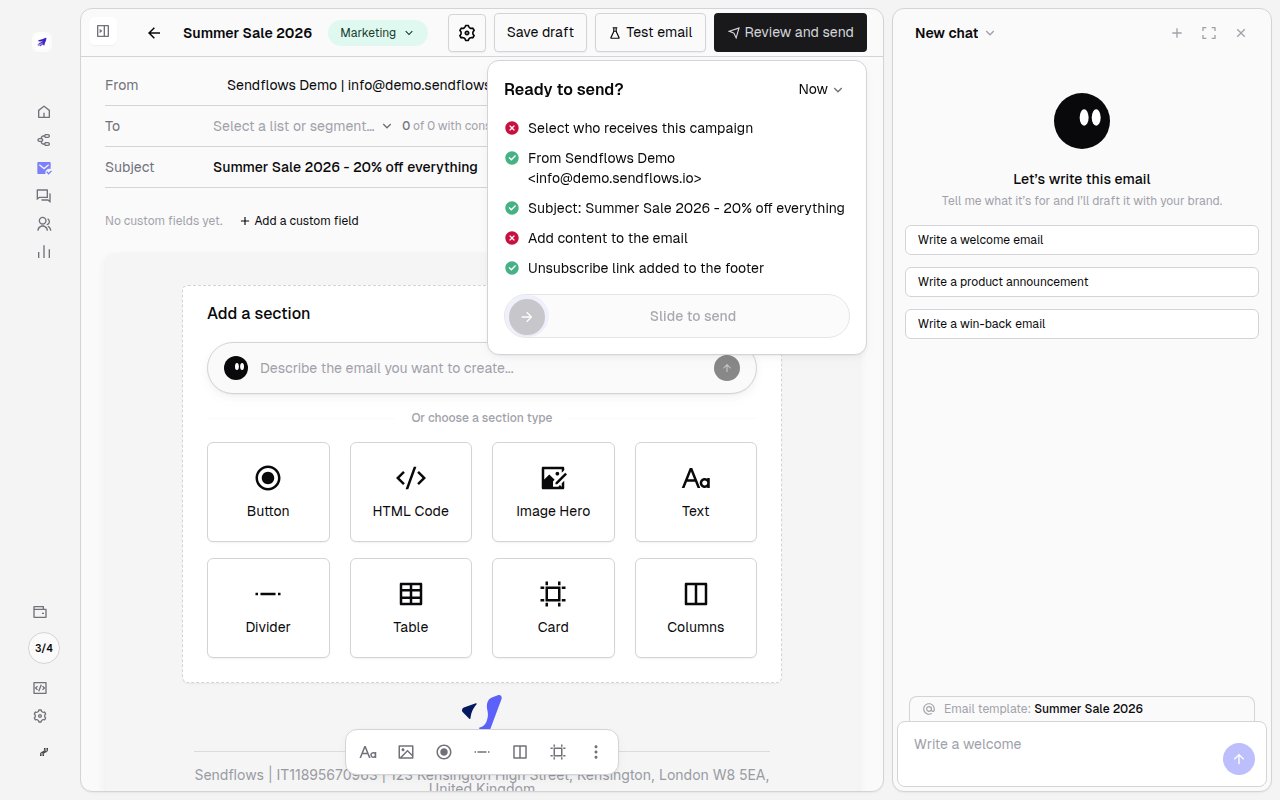
Track results
Every send records delivery, opens and clicks per contact. Check them in the campaign’s stats in the app, or via the Email template stats endpoint.Prefer to trigger emails automatically on an event (signup, purchase) instead of a one-off blast?
Use an automation.